Corvette powered Defender
-
davew

- Chairman
- Posts: 2243
- Joined: Fri Jan 05, 2007 8:54 pm
- Location: Knaresborough
- Full Name: Dave White
Corvette powered Defender
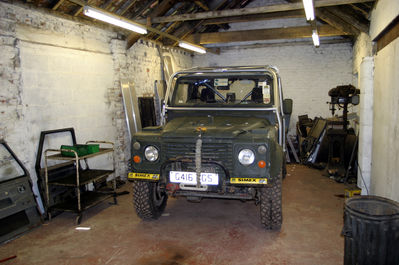
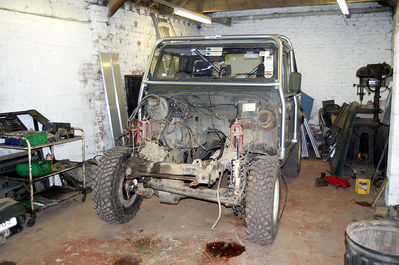
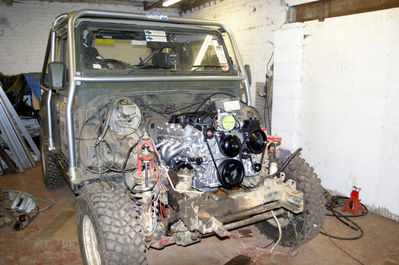
As of today my Defender has a new home...
I spent most of today emptying all the kit out of it from Great Ayton then clearing a path to the top shed at Maddison 4x4 who have kindly let me borrow their vehicle build area until it's back on the road again.
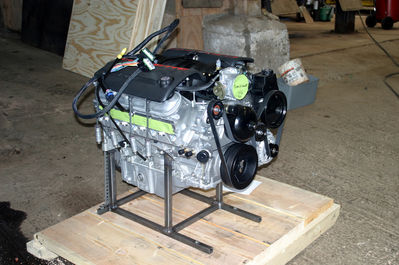
The main part of the conversion will be to fit a GM LS1 engine and matching 4L80e auto gearbox (the level 2, Bionic 80). The engine is a 5.7 litre V8 imported from a specialist engine supplier in the USA In my case I've gone for their "middle of the road" product which produces 410 horse power. The engine and gearbox are due to arrive on Monday so, this weekend's job is to remove the old engine and box. Somehow, despite shipping from different states on different days and landing in the UK at different airports both engine and gearbox are now in Bradford at the same depot waiting to be delivered !
I'll use this thread to post updates on the progress as the conversion progresses. Larger versions of the images can be seen in a personal album in the club gallery...
http://forum.yorkshireoffroadclub.net/g ... p?album=85
Heres a couple of pics from today:
Just arrived
End of the first day:
I spent most of today emptying all the kit out of it from Great Ayton then clearing a path to the top shed at Maddison 4x4 who have kindly let me borrow their vehicle build area until it's back on the road again.
The main part of the conversion will be to fit a GM LS1 engine and matching 4L80e auto gearbox (the level 2, Bionic 80). The engine is a 5.7 litre V8 imported from a specialist engine supplier in the USA In my case I've gone for their "middle of the road" product which produces 410 horse power. The engine and gearbox are due to arrive on Monday so, this weekend's job is to remove the old engine and box. Somehow, despite shipping from different states on different days and landing in the UK at different airports both engine and gearbox are now in Bradford at the same depot waiting to be delivered !
I'll use this thread to post updates on the progress as the conversion progresses. Larger versions of the images can be seen in a personal album in the club gallery...
http://forum.yorkshireoffroadclub.net/g ... p?album=85
Heres a couple of pics from today:
Just arrived
End of the first day:
Last edited by davew on Thu Mar 12, 2009 10:54 am, edited 2 times in total.
-
davew
- Chairman
- Posts: 2243
- Joined: Fri Jan 05, 2007 8:54 pm
- Location: Knaresborough
- Full Name: Dave White
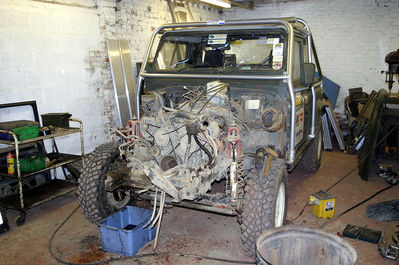
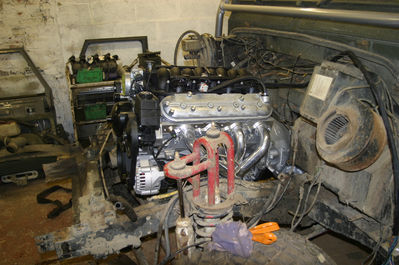
Got the old engine and gearbox out today and got rid of most of the redundant wiring that was there to suoport the 2 different engine looms.
Stripped the fuel tank covers off in preparation for the new fuel configuration.
Old engine on the hoist:
Just need to get the new ecu sorted and, with any luck the new engine will be running next weekend !
Stripped the fuel tank covers off in preparation for the new fuel configuration.
Old engine on the hoist:
Just need to get the new ecu sorted and, with any luck the new engine will be running next weekend !


-
davew
- Chairman
- Posts: 2243
- Joined: Fri Jan 05, 2007 8:54 pm
- Location: Knaresborough
- Full Name: Dave White
Day 3, by the time I got to Maddison 4x4 Patrick had removed the sides from the engine crate:
We made up some plates to bolt onto the side of the engine as they would form the basis for the engine mounts. The engine will mount using standard Land Rover mounting rubbers with no modification to the chassis, it just needs the engine side of the mounts fabricating.
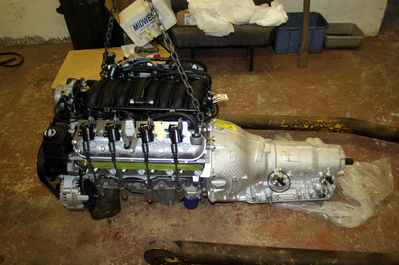
The engine and gearbox are bolted together prior to lifting into the vehicle, we're still waiting on the xfer box adaptor so that will have to go on later.
Tomorrow's job is to sort out the Megasquirt ECU and get it running properly on the other LS1 Defender. I'll also make a start on stripping out more of the redundant wiring from the vehicle and preparing the vehicle wiring that's needed to connect to the engine loom.
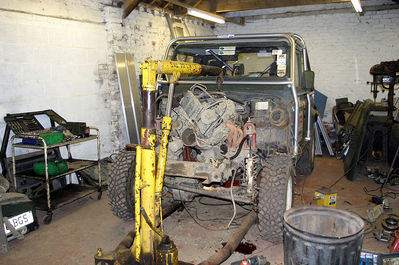
After much measuring and a good number of coats of looking at, the engine was positioned. Our original intention of using standard length propshafts went out of the window fairly quickly as the xfer box adaptor makes the whole assembly about 6 inches longer than a Land Rover setup. There's no reason I can see for the adaptor to be that long but those are the breaks. The engine mounts were then measured and tacked together in situ before they were removed for finishing and painting.
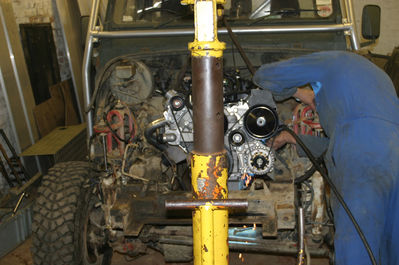
By early evening the crane was removed and the new engine mounts were bolted up tight and the rather swish looking headers could be bolted back on.
We made up some plates to bolt onto the side of the engine as they would form the basis for the engine mounts. The engine will mount using standard Land Rover mounting rubbers with no modification to the chassis, it just needs the engine side of the mounts fabricating.
The engine and gearbox are bolted together prior to lifting into the vehicle, we're still waiting on the xfer box adaptor so that will have to go on later.
Tomorrow's job is to sort out the Megasquirt ECU and get it running properly on the other LS1 Defender. I'll also make a start on stripping out more of the redundant wiring from the vehicle and preparing the vehicle wiring that's needed to connect to the engine loom.
After much measuring and a good number of coats of looking at, the engine was positioned. Our original intention of using standard length propshafts went out of the window fairly quickly as the xfer box adaptor makes the whole assembly about 6 inches longer than a Land Rover setup. There's no reason I can see for the adaptor to be that long but those are the breaks. The engine mounts were then measured and tacked together in situ before they were removed for finishing and painting.
By early evening the crane was removed and the new engine mounts were bolted up tight and the rather swish looking headers could be bolted back on.
-
davew
- Chairman
- Posts: 2243
- Joined: Fri Jan 05, 2007 8:54 pm
- Location: Knaresborough
- Full Name: Dave White
Spent today pulling yards of redundant wiring out and planning how to fit yards of new wiring in ! The bulkhead looks a lot less cluttered that it did.
Pulled some of the floor panels out, removed the instrument panel etc...
Still having problems getting the Megasquirt working with the GM sensors, have yet another cunning plan though so a few more hardware mods and I'll be ready to try again ! Need to get it working soon as I'll have the new harness made up soon and, once the xfer box adaptor arrives it'll be ready to fire up.
-
Orange rover

- Posts: 107
- Joined: Sat Jan 06, 2007 4:09 pm
- Location: Doncaster
- Full Name: Martin Ellis
looking good dave.
A bling bling rollcage now a bling bling engine .
what next?
A bling bling rollcage now a bling bling engine .
what next?
Another crappy day in paradise
WWW.OCUREM.COM
WWW.OCUREM.COM

-
davew
- Chairman
- Posts: 2243
- Joined: Fri Jan 05, 2007 8:54 pm
- Location: Knaresborough
- Full Name: Dave White
The transfer box adaptor arrived this week so first job for today was get that fitted so we can check the clearances and propshaft lengths and so on.
A couple of false starts due to the adaptor having lots of parts and very little in the way of instructions meant that it was late afternoon before the transfer box was first offered up to the gearbox... only to find the bolt holes don't line up.
After much pratting around and a fair amount of swearing we managed to get part of the adaptor bolted to the gearbox. Unfortunately, having rotated the adaptor so it fits the gearbox, the transfer box part will no longer bolt on ! By 9pm we'd finally decided that there wasn't actually a combination of positions which would allow both parts to bolt together so first job tomorrow is to take an adaptor off another vehicle and see if the holes on my adaptor have been drilled in the wrong place !
A whole day spent fitting the transfer box and tomorrow I get to pull it all apart again... some days you just wished you'd stayed in bed I did get the starter motor bolted on though !
A couple of false starts due to the adaptor having lots of parts and very little in the way of instructions meant that it was late afternoon before the transfer box was first offered up to the gearbox... only to find the bolt holes don't line up.
After much pratting around and a fair amount of swearing we managed to get part of the adaptor bolted to the gearbox. Unfortunately, having rotated the adaptor so it fits the gearbox, the transfer box part will no longer bolt on ! By 9pm we'd finally decided that there wasn't actually a combination of positions which would allow both parts to bolt together so first job tomorrow is to take an adaptor off another vehicle and see if the holes on my adaptor have been drilled in the wrong place !
A whole day spent fitting the transfer box and tomorrow I get to pull it all apart again... some days you just wished you'd stayed in bed

-
davew
- Chairman
- Posts: 2243
- Joined: Fri Jan 05, 2007 8:54 pm
- Location: Knaresborough
- Full Name: Dave White
Been a much more productive day today. Made use of the spare adaptor housing to check against mine and, as we'd suspected last night, it's been drilled incorrectly with the holes on one side drilled 60 degrees out - no wonder we couldn't get the thing lined up ! We'll use the spare and replace that with a new one once we get a replacement shipped from Australia.
With a correctly drilled adaptor plate the transfer box was soon attached to the gearbox and the chassis drilled to take the gearbox mounting brackets in their new position. The transfer box is now mounted around 5 inches further back than it's original position. Have now realised why the adaptor has to be that long - if it wasn't that long the nose of the transfer box would foul on the body of the gearbox.
We've planned and drawn up a list of parts for the exhaust system, have a cunning plan for the snorkel, the propshafts can now be sent off to be altered to the new lengths. We even managed to get the handbrake connected up and working, I was a bit concerned it would foul on the center/rear winch mount but there's at least 1/2 an inch to spare
Here's a pic from underneath...
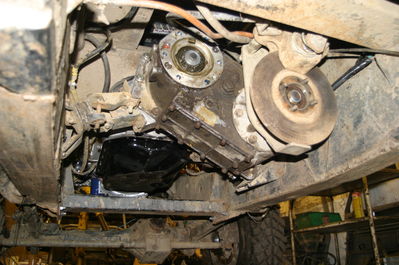
Not measured the props yet but both front and rear look like they will be about the same length. The gearbox cross member will get moved back a bit if it looks like the front prop will catch it.
With a correctly drilled adaptor plate the transfer box was soon attached to the gearbox and the chassis drilled to take the gearbox mounting brackets in their new position. The transfer box is now mounted around 5 inches further back than it's original position. Have now realised why the adaptor has to be that long - if it wasn't that long the nose of the transfer box would foul on the body of the gearbox.
We've planned and drawn up a list of parts for the exhaust system, have a cunning plan for the snorkel, the propshafts can now be sent off to be altered to the new lengths. We even managed to get the handbrake connected up and working, I was a bit concerned it would foul on the center/rear winch mount but there's at least 1/2 an inch to spare
Here's a pic from underneath...
Not measured the props yet but both front and rear look like they will be about the same length. The gearbox cross member will get moved back a bit if it looks like the front prop will catch it.
Who is online
Users browsing this forum: No registered users and 18 guests