


Roger's RRC: An update
Re: Exhaust mod
Well I finally got the rear wing on and all the lights (although the front NS wing is still off while I weld the floorpan and body mount).
Interesting point: When I laid the car up 4 years ago it had just failed it's MoT on corrosion, but all of the lights were ok. So now, with no use whatsoever, why is it that one headlight, two indicators, two sidelights and two numberplate lamps have all blown?
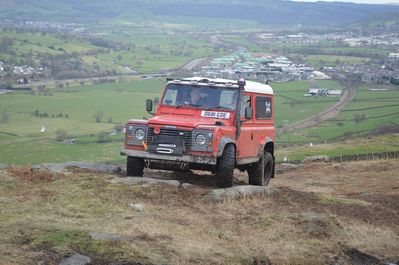
The bumpers are sorted too - it's looking a bit more like a car now
I still have to sort out the boot floor and rig the various breathers (tank, axles, boxes) to the snorkel somewhere, but then I think that's about it.
Unfortunately I am having to do overtime at the moment which is eating into Range Rover Time, but I guess it will help when the money comes in.
The Disco continues to get worse with it's smoking on startup. I nearly managed to get a set of injectors for £30 off another forum but that fell through and the next lot were on offer at £60, which is a bit spendy when I don't even know if they are the problem. I am now very reluctant to use it at all since it smokes out the estate, and I don't think I could sell it like it is - otherwise I would do without a car until the RRC is done.
Work finally agreed to me having some holiday (I am owed 11 days to be taken before Christmas!) but they have stipulated that it is after 24th November - so it's a bit late since I wanted to have the RRC done by then so that I can take part in the LR4x4 forum's greenlaning trip to Derbyshire. I had hoped to get some time off before then to finish of the car but... Well - at least I still have a job (for the moment)
Tha's all for now.
Roger
Interesting point: When I laid the car up 4 years ago it had just failed it's MoT on corrosion, but all of the lights were ok. So now, with no use whatsoever, why is it that one headlight, two indicators, two sidelights and two numberplate lamps have all blown?
The bumpers are sorted too - it's looking a bit more like a car now
I still have to sort out the boot floor and rig the various breathers (tank, axles, boxes) to the snorkel somewhere, but then I think that's about it.
Unfortunately I am having to do overtime at the moment which is eating into Range Rover Time, but I guess it will help when the money comes in.
The Disco continues to get worse with it's smoking on startup. I nearly managed to get a set of injectors for £30 off another forum but that fell through and the next lot were on offer at £60, which is a bit spendy when I don't even know if they are the problem. I am now very reluctant to use it at all since it smokes out the estate, and I don't think I could sell it like it is - otherwise I would do without a car until the RRC is done.
Work finally agreed to me having some holiday (I am owed 11 days to be taken before Christmas!) but they have stipulated that it is after 24th November - so it's a bit late since I wanted to have the RRC done by then so that I can take part in the LR4x4 forum's greenlaning trip to Derbyshire. I had hoped to get some time off before then to finish of the car but... Well - at least I still have a job (for the moment)
Tha's all for now.
Roger
-
davew

- Chairman
- Posts: 2242
- Joined: Fri Jan 05, 2007 8:54 pm
- Location: Knaresborough
- Full Name: Dave White
Good to hear you're still making progress
Don't run your breathers into the snorkel though, running them alongside is fine but running them into the snorkel can cause problems...
By creating a slight permanent vacuum in the axle/gear/transfer box case which encourages water in whenever the engine is running.
When a cold gearbox/axle hits cold water the rapid cooling causes it to suck air in rapidly through the breather, if that breather is competing with the engine for air (if you're accelerating for example), then it reduces it's capacity to cope and, again, you increase the risk of sucking water in through the seals.
If you have a problem with a gearbox/transfer box overheating and spraying oil out of the breather you can remain blissfully unaware of the problem until it runs out of oil (although you may notice an increase in performance !)
It's been a long time since my last update - busy times at work, cold and or wet weather and short days all conspire to slow progress and - since my last update I have done painfully little really..
I decided to have a go at the leaking bottom pulley seal - necessitating a front end strip and rebuild. In the end I didn't renew the seal - just cleaned up and re-seated the pulley. Hopefully that will sort it.. I am not truly sure whether I actually tightened it up the first time I put it back - it certainly came off easily with the rattle-gun this time.. I am hoping that it was loose and that's why it was leaking - I guess time will tell.
Welding the footwell and the body-mounting that is part of it and the inner wing, turned out to be a bit of a nightmare - in the end the whole area forward of the sill body-mount was replaced and rebuilt like a patchwork quilt. Now that I have decided to scrap the Disco I will cut the footwells out of that for future use rather than have to do this again. One problem with what I have done here is that I assembled the rubber mounting before welding it (so that it was correctly located), but I put the 'top-hat' washer on the bottom. Don't know if you can visualise that, but it means that I now can't get the rubbers out without cutting out the mounting or lifting the bodywork. I certainly had to be careful welding it in - lots of wet rags and air-line usage to keep the rubbers cool..
One totally avoidable delay is that I have decided to use the through-bulkhead connectors from the Disco in the RRC too - at the moment that means at least 36 well made joins (18 wires) to be done in the loom - however I will probably be putting more wires through these connectors soon. There are 33 wires available (or 40 if I get another plug for a socket that is not used) so there's plenty of scope. These appear to be a very effectively sealed type of through-bulkhead connector and they just have to be a lot better than passing wires through grommets! I commend them to the house - or anyone else doing electrical mods!
Work still to do:
The wiring (mentioned above).
Welding two straight-forward holes in the front of the inner wing - each about fist sized - no problems expected there (famous last words?)
Weld all along the inside of the nearside box-section sill - the outside is all done but the crawl-about-setting-fire-to-yourself inner face is still to be done..
Squirt bit of black gooey stuff on all the (now) rusty metal I have welded on it.
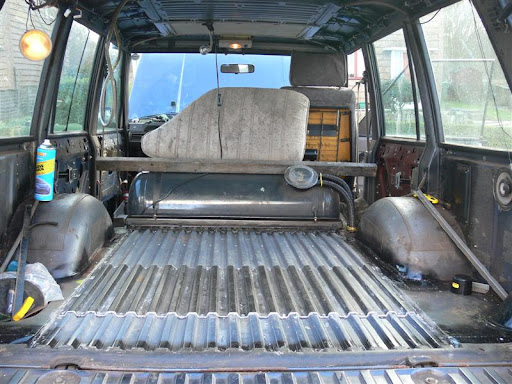
Get the fuel-tank breather fitted (I'm taking it all the way to the snorkel) and then fit the rear floor - which could be a bit of a pain actually, because the two supporting ribs (top-hat sections) are very weak and the corrugated aluminium is corroded through in multiple places and needs patching with multiple bits of the same I robbed from a scrapper a while ago.
Then there's the brakes. From what I have noticed while moving around the car, I think that three out of the four are ok, but I will only really know when I strip them. I am hoping that whatever I need to replace will be available and in decent condition on the Disco.
Recently - after once curing the engine's rich running due to a split vacuum tube, it has started doing it again. Luckily last night when giving the engine loving looks before shutting up, I noticed that there is another split - this time in a bit of tube I have already cut back and re-placed on it's T piece not so long ago - so I think that maybe I need to replace all of the vacuum pipes since they are obviously getting a bit weak.
Oh - and one more thing - I was looking at the front wheel-arches tonight and wondering if I extend the inner arch shape out through the wing what it would look like. It would certainly make an effective extended arch for zero cost, but might look a bit stupid. Hmm - knowing me, I'll probably end up doing that then
Well I guess that's it for now. Vet's bills used up all of the overtime I earned before Christmas (and then some), and now the Honda (my only transport) needs tyres and a chain & sprockets, so it's still a shoestring build and even when it's done I probably won't be able to insure it, but hey-ho - I still have a job which is a better place than I expected to be in right now and I still enjoy working on it and Sam is recovering well (for a 15 year old dog).
Hope to see you all soon, but you'll have to forgive me for not attending the club-nights for a while.
Rog
I decided to have a go at the leaking bottom pulley seal - necessitating a front end strip and rebuild. In the end I didn't renew the seal - just cleaned up and re-seated the pulley. Hopefully that will sort it.. I am not truly sure whether I actually tightened it up the first time I put it back - it certainly came off easily with the rattle-gun this time.. I am hoping that it was loose and that's why it was leaking - I guess time will tell.
Welding the footwell and the body-mounting that is part of it and the inner wing, turned out to be a bit of a nightmare - in the end the whole area forward of the sill body-mount was replaced and rebuilt like a patchwork quilt. Now that I have decided to scrap the Disco I will cut the footwells out of that for future use rather than have to do this again. One problem with what I have done here is that I assembled the rubber mounting before welding it (so that it was correctly located), but I put the 'top-hat' washer on the bottom. Don't know if you can visualise that, but it means that I now can't get the rubbers out without cutting out the mounting or lifting the bodywork. I certainly had to be careful welding it in - lots of wet rags and air-line usage to keep the rubbers cool..
One totally avoidable delay is that I have decided to use the through-bulkhead connectors from the Disco in the RRC too - at the moment that means at least 36 well made joins (18 wires) to be done in the loom - however I will probably be putting more wires through these connectors soon. There are 33 wires available (or 40 if I get another plug for a socket that is not used) so there's plenty of scope. These appear to be a very effectively sealed type of through-bulkhead connector and they just have to be a lot better than passing wires through grommets! I commend them to the house - or anyone else doing electrical mods!
Work still to do:
The wiring (mentioned above).
Welding two straight-forward holes in the front of the inner wing - each about fist sized - no problems expected there (famous last words?)
Weld all along the inside of the nearside box-section sill - the outside is all done but the crawl-about-setting-fire-to-yourself inner face is still to be done..
Squirt bit of black gooey stuff on all the (now) rusty metal I have welded on it.
Get the fuel-tank breather fitted (I'm taking it all the way to the snorkel) and then fit the rear floor - which could be a bit of a pain actually, because the two supporting ribs (top-hat sections) are very weak and the corrugated aluminium is corroded through in multiple places and needs patching with multiple bits of the same I robbed from a scrapper a while ago.
Then there's the brakes. From what I have noticed while moving around the car, I think that three out of the four are ok, but I will only really know when I strip them. I am hoping that whatever I need to replace will be available and in decent condition on the Disco.
Recently - after once curing the engine's rich running due to a split vacuum tube, it has started doing it again. Luckily last night when giving the engine loving looks before shutting up, I noticed that there is another split - this time in a bit of tube I have already cut back and re-placed on it's T piece not so long ago - so I think that maybe I need to replace all of the vacuum pipes since they are obviously getting a bit weak.
Oh - and one more thing - I was looking at the front wheel-arches tonight and wondering if I extend the inner arch shape out through the wing what it would look like. It would certainly make an effective extended arch for zero cost, but might look a bit stupid. Hmm - knowing me, I'll probably end up doing that then
Well I guess that's it for now. Vet's bills used up all of the overtime I earned before Christmas (and then some), and now the Honda (my only transport) needs tyres and a chain & sprockets, so it's still a shoestring build and even when it's done I probably won't be able to insure it, but hey-ho - I still have a job which is a better place than I expected to be in right now
Hope to see you all soon, but you'll have to forgive me for not attending the club-nights for a while.
Rog
davew wrote:Would now be a good point to suggest you add an access hole for the top of the fuel tank ?
You know what? I did think of that - and then forgot it again. D'OH!
Its a bit late now so I guess I'll just have to remove the whole thing again if I need to.. It never had an access hole anyway and it's now held in with self-tappers* so wouldn't be too difficult to get it out again.
It's mounted to the sloping bit of the footwell.davew wrote:Is the LPG tank sunk into the floor or is it sat in the rear seat footwell ?
Originally it was behind the rear seats mounted with four off 12mm HT bolts through the ALUMINIUM floor - which had turned to white powder around the holes
Rog
*I actually used "Tek" screws - heard of them? My mate gets me handfuls from his building site, but I have not seen them for sale anywhere - they are great - they have a little section of pilot drill on the front of them so for fastening down a thin skin you only need a single driver and it takes about 5 seconds to drill & screw each one.
-
dave willard
- Posts: 204
- Joined: Mon Jan 08, 2007 1:28 pm
- Location: Shepley Huddersfield
*I actually used "Tek" screws - heard of them? My mate gets me handfuls from his building site, but I have not seen them for sale anywhere - they are great - they have a little section of pilot drill on the front of them so for fastening down a thin skin you only need a single driver and it takes about 5 seconds to drill & screw each one.[/quote]
Screwfix sell Tek screws several sizes also most nut/bold outlets sell them
if the ones your mate gets are too big/small
Dave
Screwfix sell Tek screws several sizes also most nut/bold outlets sell them
if the ones your mate gets are too big/small
Dave
One step forward... While sorting the rear brakes I have noticed that the rear axle casing is badly corroded along the axle-tubes (by the look of it I reckon it was used to launch boats or similar) and so I have decided to fit the whole axle from the Disco.
You know, I am not sure that this job will ever be finished. But that's ok - I'm cool with that, I am still really enjoying working on it just for it's own sake. It's a bit of a pain not having a car (I am trying to do without until I get the RRC mobile now) but I am managing that ok (and saving money) too.
One day...
p.s. Anyone know what I need to look for in terms of screwdriver to fit the handbrake drum cross-heads? Sorry - stupid question - I bet most of you know!
TwoSheds wrote:p.s. Anyone know what I need to look for in terms of screwdriver to fit the handbrake drum cross-heads? Sorry - stupid question - I bet most of you know!
i used a simple flat head screwdriver that was an 'interference fit' (in other words, slighty too big until i whacked the back of it with a hammer to force it to fit). Giving it a whack also cracked off any rust holding it in to the threads and it gave up without a fight.
Other option would be a proper impact driver - as these usually have a range of large flat faced cross head bits with them and would fit properly.
Bugger!
Another bloody dent...
Another bloody dent...

Matthews wrote:A no 3 is the correct one but make sure it's a pozi and not a phillips, the screws are made of chocolate btw so expect to get some new ones.
Matthew
Cheers Matthew - I offered up both of my bigest impact cross heads and both seemed rather loose so I assumed I needed a bigger one. I'll try again at the weekend.
I might need a bigger hammer
Who is online
Users browsing this forum: No registered users and 31 guests